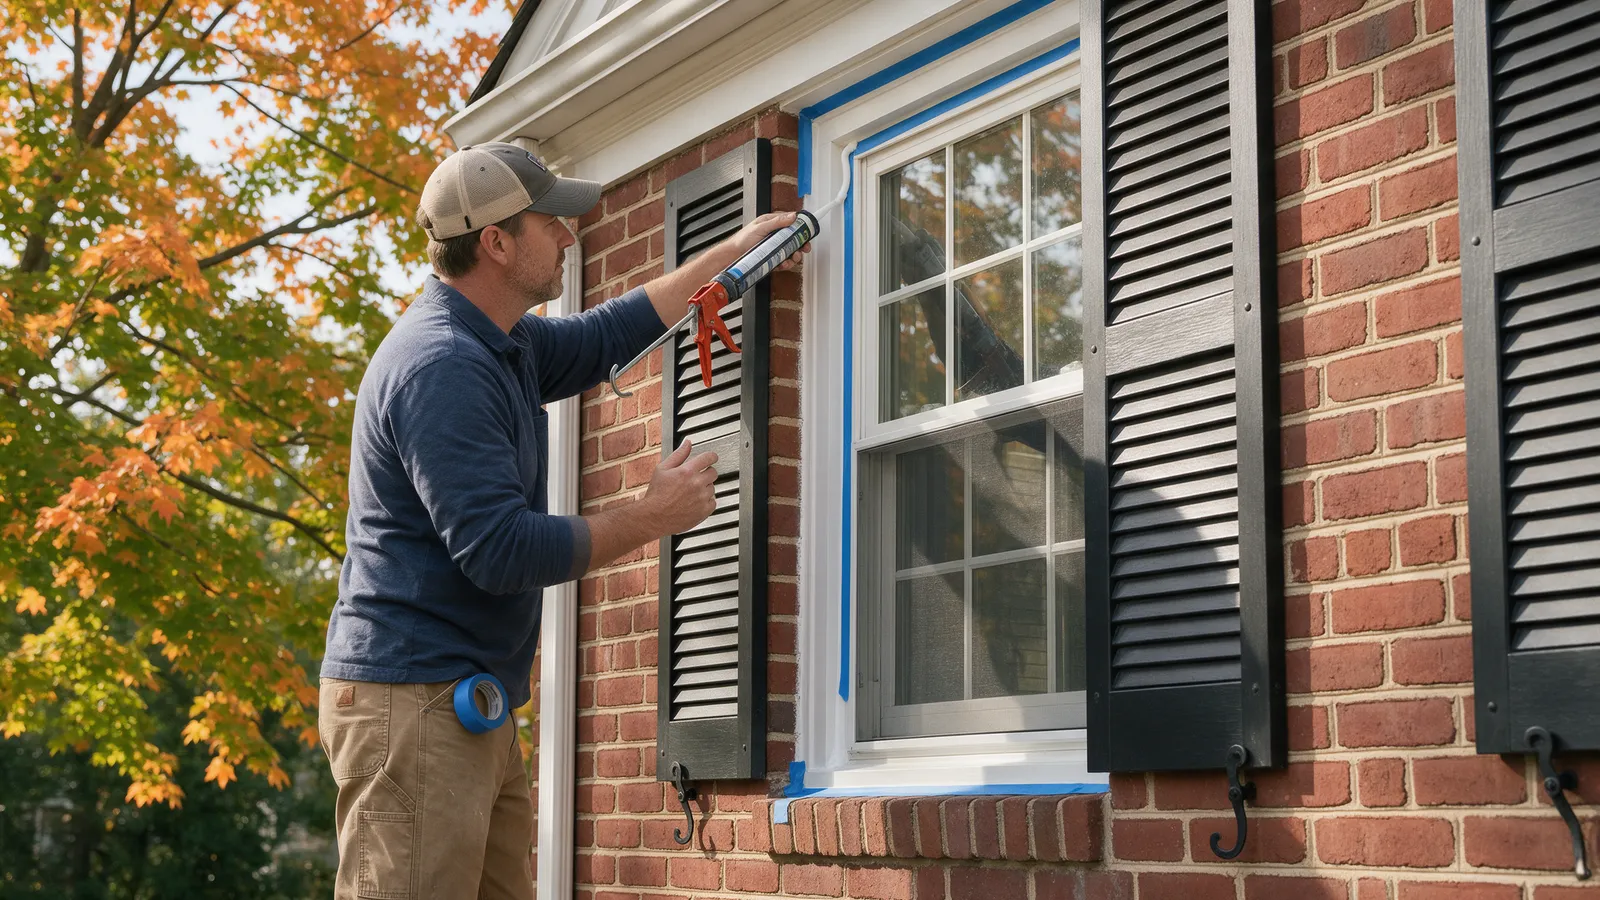
Cracked caulk around window trim is one of the cheapest leaks to fix and one of the easiest to ignore. Water gets behind the trim, the wood soaks it up, and a few winters of freeze-thaw later you have soft sills and peeling paint.
The fix is a tube of the right caulk and an afternoon. The catch is timing: most exterior caulks need the air, the surface, and the caulk itself above about 40°F. In the DMV, that window closes faster than people expect.
The temperature rule, explained
Check almost any exterior caulk label and you will see a minimum around 40°F. Titebond and GE both list 40°F as the floor for their exterior products, and several data sheets add a ceiling around 100°F. The part most people miss is that the rule usually applies to all three things at once: air, surface, and caulk.
That matters here because:
- Frames run colder than the air. A north-facing window on a brick rowhouse can sit in shade all day. The air may say 48°F while the wood is well below that.
- Nights drop fast in fall. NWS normals for Reagan National put early-November lows in the mid-40s, and the first freeze typically arrives sometime in mid-November. Caulk that freezes before it cures can be damaged.
- Dew counts as wet. Morning dew on a frame you think is dry will stop caulk from bonding.
Practical rule: caulk between late morning and mid-afternoon, on a dry day with no rain forecast for at least 12 hours, when the overnight low is still comfortably above freezing. In most DMV years that means doing it in October rather than waiting for Thanksgiving weekend. Keep the tubes indoors overnight so the caulk starts warm.
What you’ll need
- Exterior-rated paintable sealant: a quality siliconized acrylic or a polyurethane (see the table below)
- Caulk gun with a dripless or thumb-release plunger
- 5-in-1 tool or stiff putty knife and a utility knife
- Caulk removal tool (a cheap hooked scraper works)
- Closed-cell foam backer rod for gaps wider than about 1/4 inch
- Blue painter’s tape (optional, for neat lines)
- Rags, a bucket of water or mineral spirits (depending on the caulk), and a stiff brush
- Exterior primer for any bare wood
- Safety glasses and gloves
- For first-floor windows you can’t reach from the ground: a step ladder or short extension ladder set on firm, level ground
Choosing the right caulk
| Type | Paintable? | Stretch and durability outdoors | Cleanup | Best use on window trim |
|---|---|---|---|---|
| Plain acrylic latex (“painter’s caulk”) | Yes | Weak; can break down in UV unless painted | Water | Interior trim. Skip it outside. |
| Siliconized acrylic / acrylic urethane | Yes | Good; more flexible in the cold than plain latex | Water | Most painted wood and PVC trim joints |
| Polyurethane | Yes | Very good; tough, sticky, long-lived | Mineral spirits | Trim-to-brick and trim-to-siding joints that move |
| 100% silicone | No | Excellent flex, but paint won’t stick | Mineral spirits | Unpainted metal or glass, not painted trim |
Read the label for three numbers: the minimum application temperature, the rain-free time, and the time before painting. Those vary by product, and cool weather stretches all of them.
Step 1: Do a ground-level inspection
Walk the house and look at every window joint where trim meets siding, brick, or the window frame. You are looking for:
- Caulk that is cracked, shrunk away from one side, or missing
- Dark, stained, or swollen wood at the bottom corners of the trim and sill
- Paint that bubbles or peels near a joint (moisture coming from behind)
- Gaps where trim meets brick, which is common on older colonials and rowhouses as the brick and wood move differently
Push a screwdriver into suspect wood. If it sinks in easily, the wood is rotted. Caulk will not save rotted wood; see the “call a pro” section below.
Use binoculars for second-story windows. You can diagnose them from the ground, but that is as far as the DIY goes.
Step 2: Remove the old, failed caulk
Cut along both edges of the old bead with a utility knife, then pull it out with a hooked scraper or 5-in-1 tool. Old caulk on south- and west-facing windows often comes out hard and brittle; on shaded sides it may peel out in strips.
Go slow on painted wood. You want the caulk out, not gouges in the trim.
Lead paint warning: if your house was built before 1978, assume the trim paint may contain lead until a test says otherwise. Avoid dry sanding or heat guns, mist the area to keep dust down, and lay plastic sheeting to catch chips. EPA’s renovation rule treats exterior jobs that disturb more than 20 square feet of painted surface, counted across the whole house, as needing lead-safe work practices. For a full repaint or major trim scraping on an older house, hire an EPA lead-safe certified firm.
Step 3: Clean and dry the joint
Brush out all dust, cobwebs, and loose paint, then wipe the joint. Caulk bonds to clean, sound surfaces only.
- For acrylic caulks, a damp rag is fine, but let it dry completely.
- If you see mildew, which is common under heavy tree canopy, clean it with a mild mildew remover, rinse, and wait a full dry day.
- Prime any bare wood. Many caulks bond better to primed wood than to raw grain, and the primer protects the trim.
Do not caulk over a joint that is still damp from rain or morning dew.
Step 4: Fill deep gaps with backer rod
Caulk is meant to be a flexible band, not a plug. A joint filled solid to the back can’t stretch, and it tears.
For gaps wider than about 1/4 inch, press foam backer rod into the joint first. Pick a rod slightly wider than the gap (a 3/8-inch rod for a 1/4-inch gap is a common pairing) so it stays put. Push it in with a blunt tool, not a knife that could puncture it.
A common guideline is a bead about half as deep as it is wide on wider joints, but follow your sealant’s data sheet. Gaps much wider than about 1/2 inch usually mean something moved or rotted, and need more than caulk.
Step 5: Run the bead
Cut the nozzle at a 45-degree angle with a small opening, smaller than the gap. You can always cut more. Puncture the inner seal with the gun’s wire.
If you want clean lines, apply painter’s tape on both sides of the joint first.
Hold the gun at about 45 degrees and push the bead ahead of the nozzle in one steady pass, top to bottom on the sides, then across the head. Pushing forces caulk into the joint; pulling tends to lay it on top.
Work one joint at a time. Release the trigger at the end of each run so the gun doesn’t keep oozing.
Step 6: Tool the bead
Within a few minutes, smooth the bead with a wet finger, a damp rag, or a caulk tool using light, even pressure. Tooling presses caulk against both sides of the joint and leaves a slight concave curve that sheds water.
Pull the tape right away while the caulk is still wet, pulling away from the joint. Wipe stray caulk immediately; once it skins, it smears.
Step 7: Leave the bottom weep paths open
This step saves more trim than any other.
Many windows, especially newer vinyl replacements, have small weep holes or slots along the bottom of the frame to let water drain out. Do not caulk these shut. Likewise, the bottom edge of a trim piece over a drip cap or flashing is sometimes meant to stay open so water can escape.
If you are unsure whether a gap at the bottom is a drainage path, leave it alone and ask the window manufacturer or a pro.
Step 8: Let it cure, then paint
Give the caulk the full rain-free and cure time on the label, and add extra in cool, humid weather. Then paint over it with a quality exterior paint, overlapping slightly onto the wood. Paint protects acrylic caulks from UV and makes them last longer.
Diagnose what you’re seeing
| What you see | Likely cause | What to do |
|---|---|---|
| Hairline cracks in the middle of the bead | Old, hardened caulk; normal aging | Remove and recaulk |
| Caulk pulled away from one side | Poor bond, dirty joint, or bead too thin | Remove, clean, prime, recaulk |
| Caulk torn at a wide joint | No backer rod; joint can’t flex | Remove, add backer rod, recaulk |
| Soft or spongy wood at sill corners | Rot from long-term water entry | Call a pro for repair or replacement |
| Water stains on interior wall below window | Leak behind trim, flashing, or window | Recaulk outside, but have flashing inspected |
| Fogging between glass panes | Failed insulated glass seal | Caulk won’t help; glass or sash repair |
When to stop and call a professional
Caulking is a maintenance job. Stop and hire an insured contractor when:
- The window is above the first floor. Do not work above one story on a ladder. Inspect from the ground with binoculars and let a crew with proper equipment do the work.
- You find soft, rotted wood in the sill, trim, or frame. That needs repair or replacement, and caulk over rot traps water.
- Water is showing up inside after you’ve recaulked. That often points to missing or failed flashing behind the trim, which requires removing trim or siding.
- The house is pre-1978 and the job means heavy scraping or sanding of painted trim.
- Gaps are wide, getting wider, or the window is out of square, which can signal settling or structural movement.
- There are power lines anywhere near where a ladder would go.
If you use a ladder for a first-floor window, follow the 4-to-1 rule (one foot out from the wall for every four feet up), set it on firm, level ground, use a stabilizer that keeps it off the window and trim, and keep three points of contact.
Keep the water out all season
Fresh caulk is one part of keeping water away from your walls. Pair it with clean gutters and downspouts that move water away from the foundation, covered in our fall gutter and roof check and downspout extension guide. If your windows are leaking, drafty, or rotting faster than you can caulk them, see our window replacement and repair page or our siding services. DMV Exterior serves homeowners across DC, Maryland, and Northern Virginia; call 202-798-7663 for an inspection.
Common questions
What is the lowest temperature you can caulk outside?
Most standard exterior acrylic and siliconized acrylic caulks list 40°F as the minimum, and several manufacturers say the air, the surface, and the caulk itself all need to be above that. Some specialty cold-weather sealants go lower, but that is product-specific. Read the tube, and remember that a sunny 45°F afternoon can still mean a 35°F window frame on the shady side of the house.
Should I use silicone caulk on exterior window trim?
Usually not on painted trim. Pure silicone sticks and flexes well, but paint will not stick to it, so it looks wrong on painted wood and is hard to remove later. For trim you plan to paint, use a paintable exterior-rated siliconized acrylic (sometimes sold as acrylic urethane or elastomeric) or a polyurethane sealant.
Do I need to remove all the old caulk first?
Remove anything that is cracked, pulling away, or hard and brittle. New caulk laid over failed caulk only bonds to the old bead, and when the old bead lets go, the new one goes with it. Caulk that is still soft and firmly stuck on both sides can stay, but the cleaner the joint, the longer the repair lasts.
How long does exterior caulk need before rain?
It depends on the product. One common siliconized acrylic says not to apply it if rain is expected within 12 hours, and others call for at least several dry hours. Cool, damp fall weather slows curing, so give it more time than the label's warm-weather number and check the forecast before you start.
A note on safety
This guide is general information for homeowners, not a substitute for an on-site assessment. Anything that puts you on a roof, above a single story, or near power lines is work for an insured professional with fall protection.