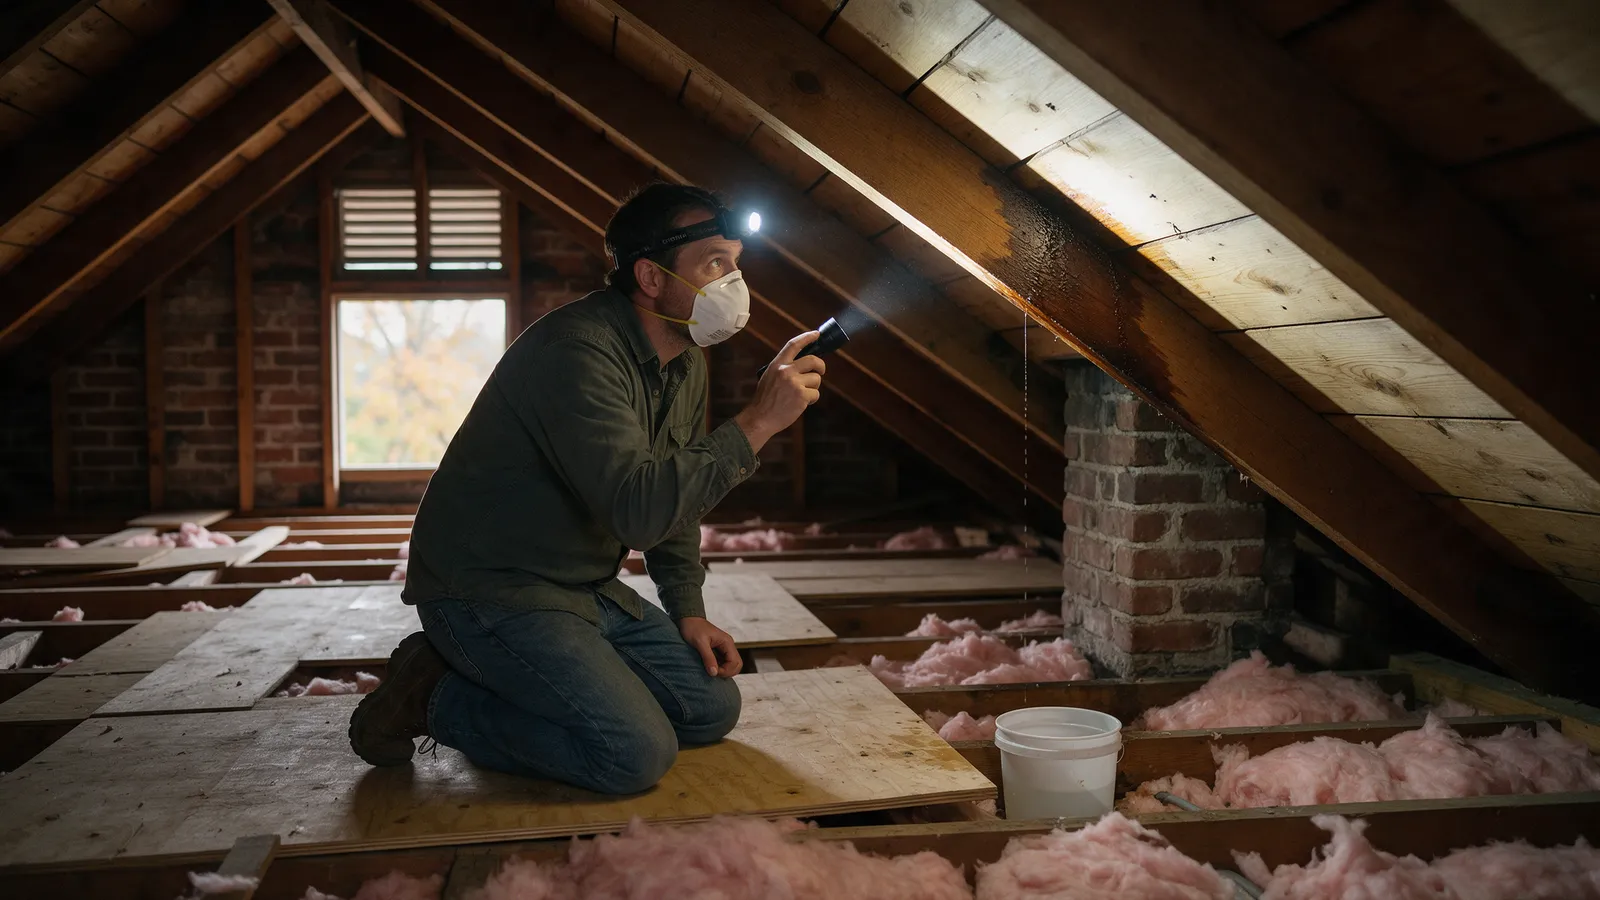
A brown ring on the ceiling tells you water is getting in. It does not tell you where. In most DMV homes, the fastest way to answer that question is from the attic, with a flashlight and a little patience, while staying off the roof entirely.
This guide walks you through tracing a leak back to its source from the inside, telling a true leak apart from condensation, and handing a roofer a precise location so the repair is quicker and the estimate is clearer.
What you’ll need
- A bright flashlight or headlamp (a headlamp keeps both hands free)
- Two or three sturdy boards or a sheet of plywood to lay across the joists if your attic has no floor
- A dust mask or respirator, safety glasses, gloves, and long sleeves for insulation
- A tape measure
- Painter’s tape or chalk, and a marker
- A phone for photos
- A bucket, a tarp, and some old towels
- Optionally, a moisture meter (inexpensive pin or pinless models are available at most hardware stores)
Before you go up: three safety rules
Step only on joists or boards across them. In an unfinished attic, the ceiling below you is drywall or plaster hung from the joists. It will not hold a foot. Lay boards across at least two joists and move them as you go.
Watch overhead. Roofing nails poke through the underside of the deck in almost every attic. A hard hat or a ball cap helps.
Pick your time. DMV attics can get dangerously hot on summer and early-fall afternoons. Go up in the morning or on a cool day, keep it short, and tell someone you’re up there. If you smell burning, see damaged wiring, or find wet insulation around a light fixture or junction box, get out and shut off that circuit at the panel, then call an electrician.
Step 1: Start with the stain and measure
Locate the ceiling stain from below and measure its position from two fixed points, such as an exterior wall and an interior wall or the chimney. Write the numbers down.
In the attic, use those same measurements to find the spot above the stain. In older DC rowhouses and colonials with plaster ceilings, you may also see a matching dark area on the top of the plaster or lath. Mark it with tape.
Step 2: Pull back the insulation and look for the wet spot
Gently move insulation aside over the stain and check the top of the ceiling and the joists around it. Wet or matted insulation, a water ring on the drywall paper, or a damp joist confirms you’re in the right place.
This is your landing spot, not your source. Water almost always traveled here from somewhere uphill.
Step 3: Follow the trail uphill
Shine your light up at the underside of the roof deck and trace any trail upward, toward the ridge. Look for:
- Dark streaks or tide lines on rafters or trusses
- Stained or darkened sheathing (the plywood or boards under the shingles)
- Water drops hanging from nail tips
- White mineral deposits or rust around nails
- Soft, delaminating, or black areas of plywood
Water can run several feet along a rafter before it drops. Keep following it until the trail stops. That highest point of staining is usually close to where water gets through the roof.
Turn off your flashlight for a moment on a sunny day. In some attics, a pinpoint of daylight through the deck shows you an obvious hole. (Light along the ridge vent or at soffit vents is normal; light through the middle of the deck is not.)
Step 4: Check the usual suspects first
Most leaks start at something that interrupts the shingles. If the trail isn’t obvious, check these spots in order:
| Where to look | What you’ll see in the attic | Likely cause on the roof |
|---|---|---|
| Around the chimney | Stained framing on one or more sides, damp brick or mortar | Failed step or counter flashing, cracked crown |
| Plumbing vent pipes | Ring of staining around the pipe, wet sheathing just below | Cracked rubber pipe boot |
| Bath and kitchen exhaust vents | Wet sheathing around the vent; also check whether the duct actually reaches the outside | Bad flashing, or a duct venting into the attic |
| Skylights | Staining at the upper corners of the shaft | Flashing failure or worn seals |
| Valleys (where two roof slopes meet) | Long stain running along the valley rafter | Worn valley shingles, debris dams, or flashing issues |
| Roof-to-wall joints (dormers, additions, rowhouse party walls) | Stain at the wall line | Missing or failed step flashing |
| Lower edge of the roof | Wet sheathing or ceiling just inside the exterior wall, mainly in winter | Ice dams or overflowing gutters |
Photograph everything with the tape measure in the frame. That gives a roofer real information instead of a guess.
Step 5: Rule out condensation
Not every wet attic has a roof leak. Warm, moist air from the house can condense on the cold underside of the roof, especially after a cold snap in January or during muggy stretches in summer. Before you call a roofer, compare what you’re seeing to the table below.
| Sign | Points to a leak | Points to condensation |
|---|---|---|
| Pattern | One defined trail or spot | Spread across a large area of the deck |
| Timing | Shows up during or after rain, especially wind-driven rain | Shows up after cold nights, or during humid weather with no rain |
| Nails | Rust or drips on a few nails along a trail | Frost or droplets on many nail tips across the attic |
| Location | Near a chimney, vent, valley, or skylight | Often on the north side, or wherever ventilation is weakest |
| Other clues | Wet insulation directly below one point | Mildew or dark staining on the deck overall, damp insulation everywhere |
In winter, frost that forms on the exposed nail tips can melt all at once on a warm sunny day and drip onto the insulation. That can look exactly like a leak. If the drips line up with nail tips across a wide area and there’s been no rain, ventilation and air leaks from the house below are the more likely culprits.
Condensation still needs attention — it can rot sheathing and grow mold — but the fix is usually ventilation and air sealing (bath fans that vent outside, sealed attic penetrations), not new shingles.
Step 6: Go back during the next rain
If you can’t find a trail on a dry day, wait for a steady rain and go back up with your flashlight (daytime, never during lightning). Active water is much easier to spot than old stains. Note where the drip appears, how soon after the rain starts, and whether wind direction matters. A leak that only shows up in a nor’easter blowing from one direction points a roofer toward one side of the roof.
Roofers sometimes run a controlled hose test on the roof to pin down a stubborn leak. That’s a job for the professional on the roof, not a family member on a ladder.
Step 7: Mark it and protect the house
Once you’ve found the likely entry point:
- Mark it with tape on a rafter and a note, and record the measurements from an outside wall and from the ridge. A roofer can transfer those to the roof surface.
- Catch the water with a bucket or tarp, and pull soaked insulation away so it can dry.
- Protect the ceiling below. If a ceiling is bulging with water, keep people out from under it and call a professional — sagging wet drywall or plaster can come down.
- Take dated photos for your records. If the leak followed a storm, they may help with an insurance claim.
When to stop and call a professional
You’ve done the useful part. Stop and bring in an insured roofer if:
- The source is on the roof surface, which nearly every leak is. Do not climb onto the roof to “take a look” or dab on sealant.
- You find soft, sagging, or rotted roof sheathing or rafters. That’s structural.
- Water is near wiring, light fixtures, or junction boxes. Call an electrician too.
- A ceiling is bulging, cracked, or stained across a large area.
- You see black or fuzzy growth on the sheathing over a wide area. That may need mold assessment, not just a roof repair.
- The leak appeared after a storm with high wind or hail, and you may file an insurance claim.
When you call, share your photos and measurements. A roofer who knows the leak is “about 4 feet below the ridge on the left side of the chimney” can usually get to the problem much faster than one starting from a ceiling stain.
If you’ve traced a leak and want a second set of eyes, our roofing team handles leak diagnosis and repair across DC, Maryland, and Northern Virginia, and our storm damage page explains what to document after severe weather. Leaks along the lower roof edge often start with clogged gutters, so pair this check with our fall gutter and roof checklist, and see the areas we serve. Questions? Call 202-798-7663.
Common questions
Why is the ceiling stain nowhere near where the roof is leaking?
Water rarely drips straight down. It usually runs along the underside of the roof deck, down a rafter, or across the top of a ceiling joist before it finds a low point and soaks through. That is why you start at the stain and work uphill in the attic, following the trail rather than looking directly above the spot.
How can I tell attic condensation from a real roof leak?
Condensation tends to be spread out: frost or droplets on many nail tips, damp sheathing across a large area, and it shows up after cold snaps or during humid weather rather than only when it rains. A leak usually leaves one defined trail that starts at a specific point, often near a chimney, vent, skylight, or valley, and gets worse during wind-driven rain.
Can I fix a roof leak from inside the attic?
Not permanently. You can catch the water, move insulation away, and protect the ceiling, but the actual repair has to happen on the roof surface: flashing, shingles, or sealant at the point where water gets in. That work belongs to an insured roofer, not a homeowner on a ladder.
Is it safe to walk around in my attic?
Only on the ceiling joists or on boards laid across them. The drywall or plaster between joists will not hold your weight, and stepping through it is a common and avoidable accident. Watch for exposed nails overhead, wear a dust mask around insulation, and avoid attic work on hot afternoons.
A note on safety
This guide is general information for homeowners, not a substitute for an on-site assessment. Anything that puts you on a roof, above a single story, or near power lines is work for an insured professional with fall protection.